Author Archives: slloyd47

More on Editing

Blog_20100627_1

Two blogs ago I talked about the need now and then to stop and clean up your image library or archive. Here are some additional suggestions on deciding which images to keep or reject:

  1. Exposure – is it so off you can’t hope to get a good print. Blown out highlights, blacked out shadows (not recoverable), etc.
  2. Sharpness  – this covers out of focus images or images with camera or subject motion. Inspect the image at 100 percent. Is it sharp where it needs to be? If not toss it.
  3. Composition – is the subject clearly defined? Are there distractions that can’t be readily cloned out?
  4. Light – is the light dull or inappropriate for the image?
  5. Impact – does the images say more than “I was there”. Is it creative?
  6. Comparison – do you have better shots of the subject? Does this add a new perspective? A better one?

Here are some other questions I ask myself.

  1. Would I ever print this?
  2. Would I show this to another photographer I respect?
  3. Does this image make me look like a better photographer?

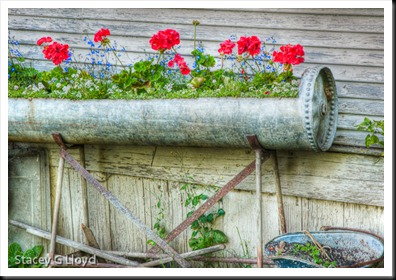
Blog image: A container of geraniums shot using 3 exposure HDR. Processed with Photomatix and Nik Soft Color Efx Pro plugins.

Posted in Uncategorized

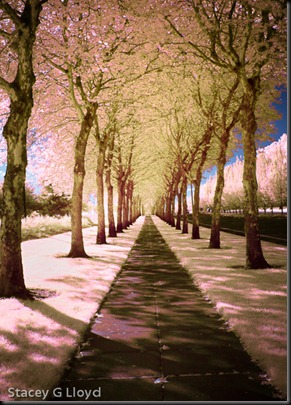
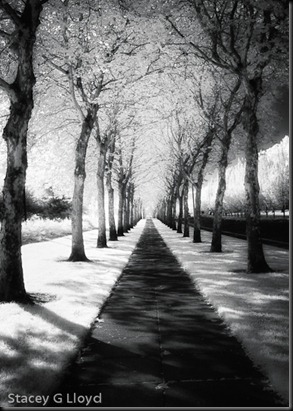
First IR Images

Blog_20100628_1As I mentioned on Facebook a while back I had my old D70 converted to InfraRed (700nm filter). This filter lets me work with color IR images as well as traditional B&W. I am just now getting around to shooting a little with the modified camera and learning how to best post process the images to my taste. Down the road I will likely discuss my post processing approach. Blog_20100628_2In the meantime I am sure I will be tweaking it for a while. Shown here is one image processed for color and then B&W. What do you think? Do you like one treatment better than the other?

Posted in Uncategorized

File cleanup or editing down

Blog_20090119_1 

After you have been shooting a while you end up with a lot of images. This is especially true in the digital age. When I say a lot, I mean tens of thousands if not hundreds of thousands. It happens relatively quickly (especially if you shoot HDR). Organizing managing this morass of images can be a real challenge and a time consumer.

I am in the midst of a big cleanup and edit down effort. Sometimes you just have to stop your other work and dig in. Even if you do basic tagging and editing down as your download your images, after a while you need to go back over the images. Especially after they are a year or more old. You are able to look at the images with new eyes, some will look better (fun discoveries) and some will just not cut it anymore (delete bin fodder). Knowing how aggressive to be in doing this is a real challenge. It is easy to think you will be able to salvage some image down the road (and sometimes it is worth it). But most of the time you have to ask yourself if you really want to spend that much time on that image. Maybe there are better ones to work on – we only have so much time.

Thoughts on cleaning up you image database:

  1. Editing down in passes – don’t try to stop along the way and salvage images (starting editing the image). You will never make it through. Do one pass of eliminating technically flawed images, another of adding tags, etc. if you see something you like mark it and move on (use star, color, etc).
  2. If you are just starting. Be disciplined: edit down and tag your images as you load them unto the computer. Take full advantage of your photo organizer – whatever it is. Don’t get paralyzed thinking you might decide to do it differently down the road. If you don’t do anything along the way you are in bigger trouble than not editing/tagging “the best way”.
  3. You may want tags to include things like the place (Oregon, Portland, zoo, etc.),what (grass, tree, etc.),colors,technique (pan, HDR, multi-exposure), style (B&W, impressionism, etc.), etc. It is up to you. You will likely come up with new tags as you start to use your image library and can’t find a specific image!
  4. Using stacking or sets in your library helps eliminate clutter. You can stack very similar images, HDR sets, depth of field sets, etc.

This whole editing down process can be tedious and long. Reward yourself somehow along the way. May it is stopping after a couple hours to work on that great new image you found or may be you should go out and get reacquainted with your family 😉

Blog Image: One nice find as I reviewed images from Jan 2009.

Posted in Uncategorized

Marketing Your Photography (or getting your work/name out there)

Blog_20100608_1

I have been refocused as of late on sales and marketing. Or put another way, getting my photographs (and name) out there for others to see and purchase.I have established a “web presence”  (this blog, website, facebook and flickr) but that is not enough and  even on the internet my visibility has been limited. Marketing/selling my work has not really been my strength so far (my wife is much better at it). I enjoy creating the images too much and need to discipline myself to work at the marketing part.  Not that I haven’t had plenty of ideas, but I need to pick specific ones and go after them. Ideas have ranged from magazine articles to photo competitions to door to door selling at businesses to art fairs to galleries, etc.

While refocusing on marketing ideas I have slowed down the amount of shooting I do. In addition, I haven’t been posting as many blog entries as you might have noticed. There is only so much time outside of my day job;-)

Not sure this blog entry is of much general interest, but just thought I would share where I was at now days. If you have marketing ideas that really worked for you that you would like to share (or maybe not) feel free to post them as a comment.

Blog image: A circular swipe of a cluster of beautiful flowers in the front yard of a home in Port Townsend WA where my wife and I just celebrated our 31st anniversary.

Posted in Uncategorized

Lupine

Blog_20100526_9

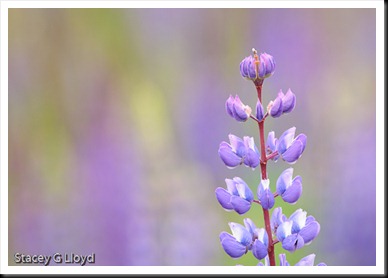
I have always meant to work a bit on lupine shots when it was in season. This year I did get a chance to “work” the lupine a bit.  Some shots are in the field and some are in the studio.  Click on the blog image (or on gallery) to see a gallery of images.

As you will see I used many techniques when working the lupine: wide angle, telephoto, macro, overlays, pans, multi-exposure, glass panning, etc. Enjoy.

Posted in Uncategorized

Azalea Blooms – Updated

Blog_20100530_1

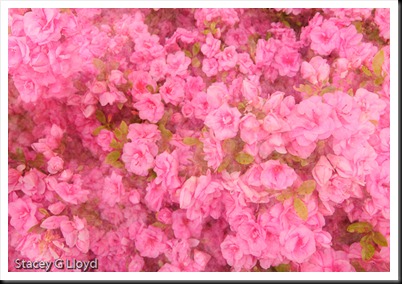
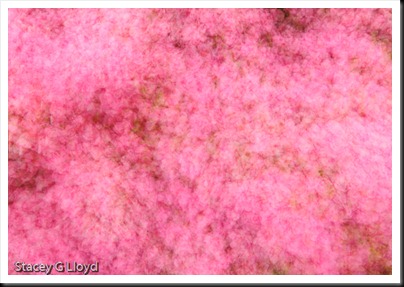
I haven’t had much time to write lately, but here is a overlay shot of Azalea blooms. It was taken in my yard of a bush that bloomed better this year then ever before.  I wanted to capture it in a way that conveyed the profusion of blooms. This overlay consists of two shots. The first, a 9 multiple exposure moving the camera around to fill all the frame. The second shot is a straight shot filled with blooms. I then blended the two to taste in camera using Nikon’s “Overlay”.

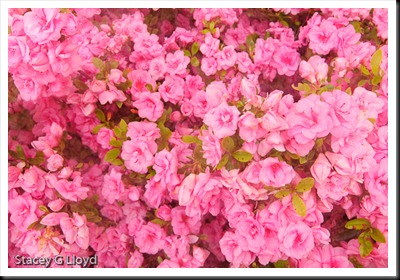
Update: I decided it might be useful if I added the two source images that were blended. One reason to blend these two images is to fill the black holes you get with rhodies and azaleas.

The single shot image:Blog_20100530_1-2

The 9 exposure:Blog_20100530_1-3

Posted in Uncategorized

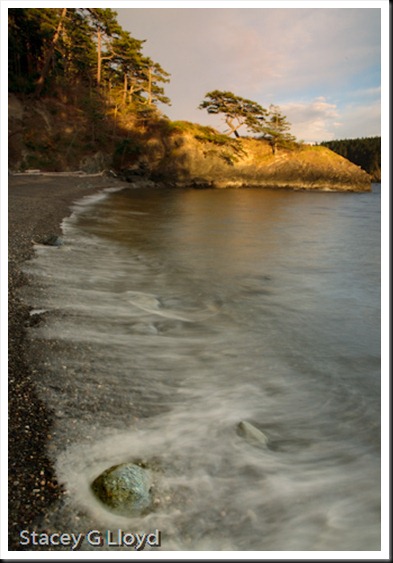
Deception Pass Beach – Before and After

Coupville_1-2 

I have been asked a couple of times now about one of the images I created at the recent Tony Sweet workshop I attended – the image you see above. I decided this would make for a good "Before and After" blog entry so here it goes.

For this image I really need to address the shoot as well as the post processing.

The shoot (or creating the score):

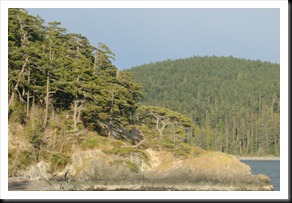
  1. I spotted the interesting tree from a distance but the tree was not separated well from its background as shown here.Coupville_1-4
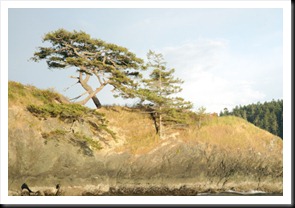
  2. After hiking around a bit I realized that I could get the tree against the sky if I went down on the beach and walked a little ways – next image.Coupville_1-5
  3. I then framed the shot using the boulder for some foreground interest given I had selected a wide angle lens to capture the sweeping beach leading to the tree.
  4. I wanted to capture the motion of the water so I added a variable ND filter to allow for the longer exposure (1.6 sec).
  5. The bad and good news was that now the beach was totally in the shade. To compensate for this I used a soft edge 2-stop ND on the sunlit tree and sky – feathering during the exposure.
  6. I then waited for a big enough wave to come in past the boulder and clicked the shutter as it started to recede.

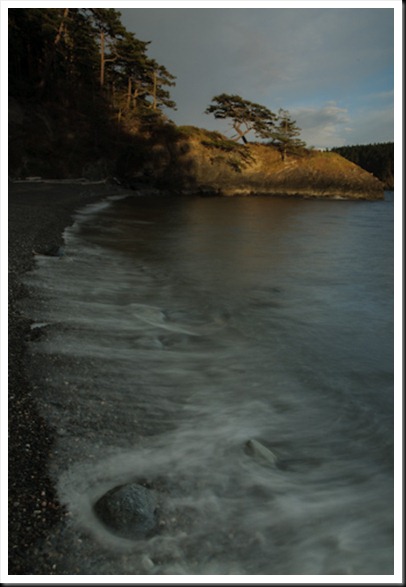
Coupville_1-3I waited to get more than one image , but the waves never came up that far again.

The post processing (or the performance):

  1. Once in Photoshop I first adjusted the levels.  The image was a bit under exposed as you can see. That is why I wanted another shot.
  2. I then used Nik Sof’t ColorEfx Pro "Contrast Color Range" to add some contrast.
  3. Then using Nik Viveza I lightened the upper left corner which was to dark due to the split ND.
  4. Given the beach was in the shade it was a bit blue and dingy so I used the "Warmth and Brilliance" filter to warm it up and brighten up the whites.
  5. To make the boulder pop, I again used a Viveza control point  (limited to the boulder) and boosted the brightness, contrast and saturation just a little bit.
  6. Finally to bring out the color in the sky I again selected it using a Viveza control point and increased the saturation slightly on the pink in the clouds.

Hope that is useful and sufficiently explained. Let me know if there are more questions.

Posted in Uncategorized

Workshops – Follow-up

Stacey_5 

My workshop with Tony Sweet has come and gone. Overtime I will show many of the images from the workshop here in my blog. What did I learn? I think mostly a lot of small things that will come out in my images over time. For now here are my thoughts on workshops after going to this one (big sample so take this for what is worth):

  1. Know what you want to get out of the workshop. Tony noted that it was really up to each of us decide what that is. For me it was the opportunity to be taught directly by Tony and hopefully take my skills just another notch up.
  2. Workshops can be exhausting. Getting up for sunrise and shooting past sunset can disrupt your sleep a bit. If you are like me and can’t easily nap in the afternoon (or get anxious about not being able to sleep) it can start to take a toll. Meal times get moved around as well (if you get one) – bring lots of snacks. Good thing workshops are typically just a few days.
  3. A good chance to meet and hang out with other photographers. Getting to hang out with others who are obsessed like you can be interesting. Like myself they may stop mid sentence and say something like “look at the light over on that tree” and pick up where the left off without skipping a beat. You also get a chance to see how others see and shoot the same subject. This can broaden your vision.
  4. Workshops are like a photographic marathon. A chance to exercise all your photographic skills and techniques.  Or maybe like doing calisthenics were you exercise each muscle group. We went on 8-9 shoots so lots of opportunity to work (I am sure this varies workshop to workshop).
  5. As I have noted before, In order to see images when you are away from home you need to be practicing where you live. I think this applies to  workshops as well.

Stacey_6

I am sure there is a lot more I could write, but that will do for now. One difference from shooting around your area, at a workshop you need to stay out of the other photographer images;-) That is another story…

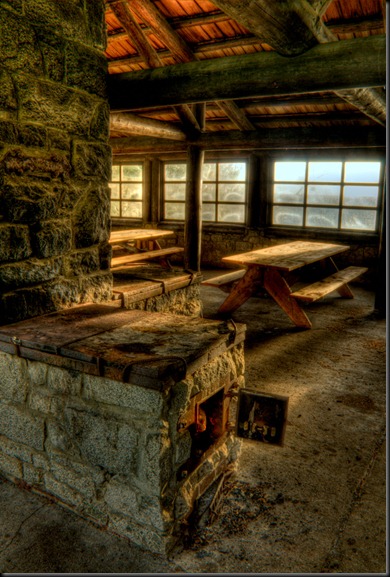
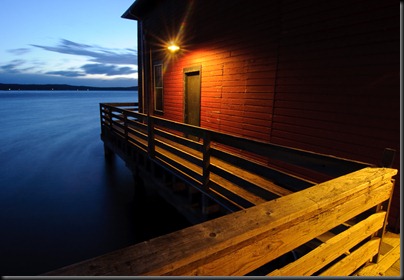
Blog images: An HDR image from the picnic area at Deception Pass State Park. We had a spectacular sunset shoot there. Next is an image from the Coupeville Pier – note this is not HDR just well balanced lighting.

Posted in Uncategorized

Workshops

Bridge of Tranquility

In my time as a photographer, I have not attended a “photography workshop”; I have read a lot of books, watched videos,  taken colleges courses and attended online classes.  On top of that has just been a lot of hands on experience.

So why am I going to a workshop at this point? Well in this case the first reason is a chance to get hands on time with one of my favorite photographers, Tony Sweet. If you have never looked at has work, take time to peruse his blogs or website, www.tonysweet.com.  A second reason to go is to see how a workshop is run. I am teaching students now days and may want to run a workshop of my own in time.

I will be at this workshop for most of the week so I don’t know if I will get in another blog entry in during the workshop. I suspect I will be busy processing and shooting images. I will let you know how the workshop goes.

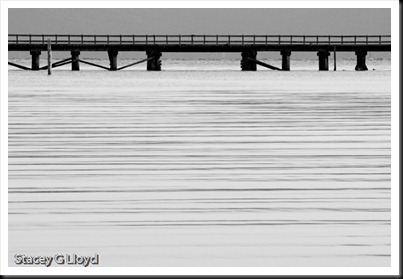
Blog Image: A tranquil scene of a trestle over calm water. The strong horizontal lines in the water is what caught my eye. This image has basically just been converted to B&W in Lightroom 2.

Posted in Uncategorized

Engine 4449 – Before and After

Blog_20100509_1

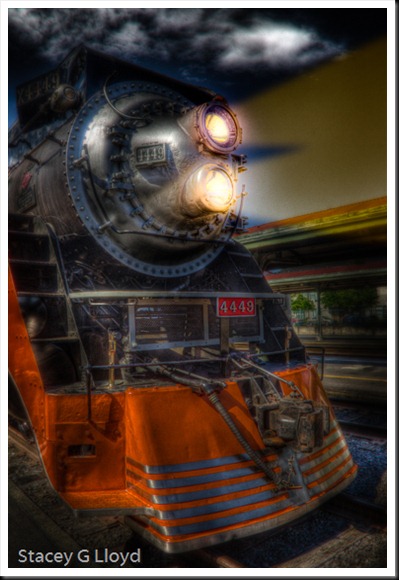
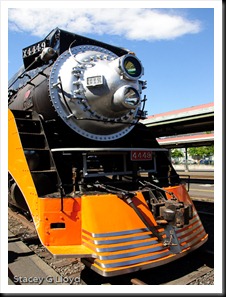
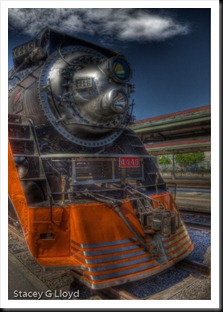
On national train day (May 9th) I went down to Portland’s Union Station with my wife to see the Daylight engine (#4449) out in the open. It was crowded and busy so I had to frame my shots carefully and often very tight to get rid of distractions. As time went on, things opened up a bit and I got this shot. I have taken it from daylight to “nightlight” using Photomatix, Nik Software and Photoshop CS5. Here are the basic steps.

  1. Blog_20100509_17 exposures at 1 stop apart (12mm lens) combined in Photomatix and processed dark and grungy – first image on left is one of 7 originals exposures. The second image on the left is the Photomatix output.
  2. Image opened in Photoshop and Blog_20100509_1-4the Nik Software ColorEfx Pro “Pro Contrast” filter applied.
  3. The Midnight filter from ColorEfx Pro was then brushed to  darken the image – from 60% opacity at the edges to 30% near and on parts of the train – next image on the left.
  4. The headlamps Blog_20100509_1-3were then lit up using Nik’s Viveza. Third image on left.
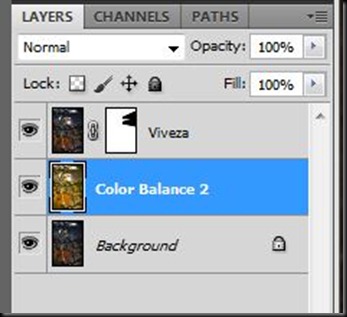
  5. A duplicate layer was created in Photoshop and the layered was lighted using Apply Image set to Screen. This layers color balance was then shifted to match the headlamp tones.
  6. The final step was to move the new layer (color balance 2)down (behind) the previous layer (Viveza), select the light beam shapes using the Polygon selection tool (twice additively), feather the edges (around 30-40) and create a hide selection mask. See the layer stack.

Headlamp mask

The final image is at the top of the blog. This was a pretty complex set of steps that a video would do wonders to explain, but until then hopefully this gives you some ideas of the process.

Posted in Uncategorized