Category Archives: Uncategorized

Critiques and Clubs


As an artist you inevitably end up placing your work into either competitive or critique situations. This happens when you submit work to art shows, stock agencies and/or galleries. Getting critiqued or having your work judged can take some getting used to. One good way to get some experience handling critiques is to join a photography club. Photography clubs generally provide many opportunities to have you work judged and/or critiqued (my club has both a competition night and a critique night once a month). Having your work critiqued or judged in a club setting can prepare you mentally and emotionally for the critiques that come when you are marketing your work. Clubs are also good place to meet other photographers, get inspired by what they are doing or find out about new places to shoot.

In choosing a photography club (if you have a choice) you might have to visit a couple to decide where you want to stay. If you are to get critiques that you will accept, you need to respect/like the work of those critiquing you. So keep that in mind if you are joining a club for that purpose.
One last note, while winning competitions can be fun. Don’t let it drive your shooting. Be true to what you like and use the critiques to hone YOUR work. Besides, when you make a sale, you really win!
The blog image (HDR image entitled “Train to Oz”) is one I just recently submitted in a club competition. While it didn’t win, it did well. There was some pretty stiff competition. Another image I submitted (seen in a previous blog) did win in the category completion.

A change of pace

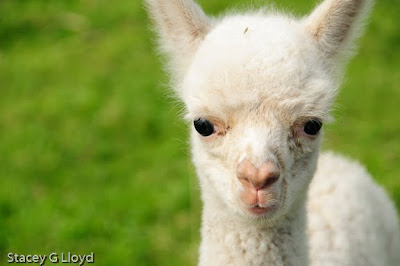
Just for a change of pace I stopped and shot a couple pictures at the local alpaca farm. I have included a few shots here in the blog. The alpaca’s were generally in the shade (but not always) with a bright sunny background. This creates some challenges for a photographer. Shooting HDR with moving subjects is not really an option (yet) so I decided to let the backgrounds blow out and use a shallow depth of field when possible (f6.3 for most of these shots – allows for some focus error due to animal movement). But the backgrounds don’t totally go white so I had to make some post processing decisions. For the lead image I selected the background and increased the exposure until it went totally white. In the second image I diffused the background and added a vignette.

Have I got a secret for you.

Hey there.

Rainy Day

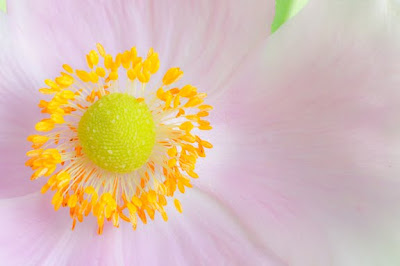
We have a joke here in the NW, “What do you call two rainy days in a row? – A weekend”. We’ve been having beautiful 80 deg weather right up to Labor Day weekend and what do you know, two days of rain so far with 80 deg weather forecast for Tuesday. I had planned to go out and shoot this morning in the garden, but it was too windy and rainy to do that. So I went out to the garden and cut a couple of the flowers, the ones I had planned to shoot outside, and took them in doors. The blog images are from that shoot – what follows is a brief outline of how I created the images.

First, after cutting the flowers and putting them in a small vase with water, I set up a small table next to the window as shown – it was cloudy so the light was nice and diffused. I have a set of fabrics on a rod that I use for backgrounds on such occasions (al a Tony Sweet’s studio). In this case I chose a light spring green. Second, I popped a Lensbaby 3G on my D300 and proceeded to create. I used a f4 aperture ring on the Lensbaby and in general used the push method where you extend the Lensbaby bellows instead of compressing it. I moved the flowers as needed to create compositions that seemed pleasing to me. I also needed to use a small reflector to fill in some of the shadows (a white sheet of paper does the trick). Later I put on a 50mm lens with an extension tube to do more closeup work. Note, I also used a tripod and cable release as feasible. Once I had the images I wanted, I went through a set of post-processing steps as needed.
  1. Load image into Lightroom and sort through the images in the Library mode to find ones you want to develop (discard the rest). Go to the Develop mode.
  2. Adjust the Exposure slider to the right until the histogram is to the right without blowing out the whites. I do this for creating a light airing feeling – called “high key” lighting.
  3. Use the Fill Light slider to get rid of “black holes” – they tend to draw your eye. Try to avoid these with the reflector during the shoot.
  4. If there are some really dark areas, you may need to use the Adjustment Brush to select an area and increase the local exposure and/or brightness.
  5. Use the clone tool to remove imperfections from the flowers – brown spots just don’t look good (the flowers you cut should be as pristine as possible).
  6. In a soft focus image like this, I might use the Adjustment Brush to select the focal point (one focused area where the eye can rest) to add some Clarity and/or Sharpness.
The final image is one shot with the 50mm lens with a little diffusion added in post processing.

Back in the Saddle


Well this week I submitted two bodies of work to a local cultural arts center for a possible exhibition next year. Just after picking up my rejected material from the local coop gallery last week my wife and I stopped by the cultural arts center. We happened to catch the curator there setting up the next exhibit. While the primary call to artist for next year’s exhibits was over, the curator did say that if I brought something in it may be taken in as a late submittal. So I submitted two bodies of work – People of the Plateau and Simple Impressions. These are very different bodies of work. Given the quick turn time I didn’t have the usual time to research what type of work they usually accept. We will see. But the arts center is in a bigger town and a bit more progressive. That leads me to an additional comment on the coop gallery rejection.

After talking with the coop gallery jury foreman, it quickly became apparent that even though I had asked specifically about the galleries recent decline in photographic work, the answer was not correct. It turns out that photographic work had not been selling well so they were really not inclined to accept new photographic work. In addition, it appears the jury foreman was somewhat new to that position. Unfortunately that is who I talked to the most before choosing a body of work. This is a small town and without going into specifics, the jury “just didn’t get it” when it came to several of the impressionistic images. So live and learn.
As for the Cultural Arts Center submission, only time will tell. While a show there will not necessarily result in direct sales, it does increase your name recognition and may result in indirect sales on your website.
The blog image is a promo I created for the People of the Plateau. I gave a copy of this to the curator hoping he would hang it on the bulletin board in his office he mentioned the week before. Click here if you haven’t visited my People of the Plateau website gallery before to see more.

Return of the Morning Mist – Fog

As I went out for an early shoot last week I was pleased to find that the early morning mist (or fog) had returned. It is not near as frequent in the heat of summer. Foggy/misty mornings are probably my favorite shooting condition.

A couple comments on shooting fog.

  1. Generally setting your exposure compensation to +2/3 or +1 is best to keep the fog from being underexposed. Check your histogram.
  2. A little color in fog is very good thing. Sometimes it is naturally there: yellow from the sunrise or blue from twilight. A little magenta added via a filter or post-processing can be nice as well.
  3. Take advantage of the background separation that fog or mist provides. Trees that never stood out because of background clutter can suddenly be outstanding.
  4. If the subject is too far into the fog it can quickly loose its impact. Move in closer. Use a wider lens if necessary (or zoom less – often the case).
  5. We tend to see more depth and contrast then you will in the photograph. I find this even more so when shooting in fog. Closing one eye always helps.
  6. Objects staggered back into the mist create a great deal of depth.

Click on the blog image to see a gallery that illustrates many of these points. Or click here. Especially note the different color hues the fog takes on. It is often related to the surroundings.

Dealing with rejection

One of the things an artist/photographer has to deal with is the rejection of his/her work. In fact that will be the case much more often then not when submitting work to galleries, publishers, etc. If you haven’t guessed by now, my submission to the local coop gallery was not accepted. The thing you have to remember is that the reasons for rejections can be many.
  1. Your work doesn’t match the galleries client base.
  2. Your price range doesn’t match their market.
  3. The style of your work is too different from anything else they carry.
  4. They already have too much similar work.
  5. The rejection is not a reflection on you personally, the validity of your work, the time you invested, etc.
When submitting to galleries it always pays to visit them multiple times and get a feel for their work, get to know the owner, understand their customers, check out their price range, etc. Note however that doing all of this will not guarantee success, but it will improve your chances. In my case here, I did these things and it still didn’t work out.
I am meeting with the coops jury foreman in the next few days to see it I can glean any constructive feedback from this particular submission. I may comment on that in a future blog.
If you click on the blog image you should go to a small gallery of the images I submitted. Let me know your thoughts – what do you like or dislike.
As one photographer put it, “.. the point is not the rejection, it’s how you handle it.”

But I will say, you don’t have to like it!

This Blog

While I am finishing up my prints for submission to the Vally Arts gallery (my favorite is the blog image), I thought I would make a few comments about this blog. I began writing this blog at the beginning of the year as a way to share my experience and thoughts as a photographer. It is a good way practice writing and present some of my work to a broader audience. But it is also way to teach others what I have learned so along the way some entries will be more of a tutorial nature. If you are reading a blog entry or looking at the attached images and have questions, feel free to ask about how, where, when, etc. they were made. I will be glad to share. I know over the past few months there are been several hundred visitors so I know you are out there. Feel free to jump in, ask questions and share your own experiences.
Only five more days before I submit my prints to the gallery for a jury review. Hopefully they make it in. I did go with a set of impressionistic images as you can tell.

Side note: I am finding as William Neil points out in his latest Outdoor Photography column that impressionistic images look best as large prints.

Photography Anywhere

If you get busy at times and don’t have a lot of time to go out and shoot pictures, remember you can shoot them anywhere. I have taken many good pictures in business parks and their surroundings. In fact I am submitting one to a gallery next week. The two images included here were shot in a field near a parking lot. The lighting was nicely diffused by some clouds passing overhead (flowers almost never photograph well in direct sunlight). The background color was wonderful and setting the f-stop at 9-10 gave just the right depth of field – flowers in focus – background soft.

Relax

Well, I am getting a set of prints ready for a juried submission into a local coop art gallery. Choosing the set of images and even which body of work to submit can create a bit of anxiety. Having visited the gallery many times before (highly recommended), I do have a sense for the type of work that should be acceptable, but you never know. Should I press it and submit work that is a bit more on the edge (market differentiation) or stay with a more classical body of work? Then out of the hundreds of possible images, which do I want to submit? These are not easy questions.
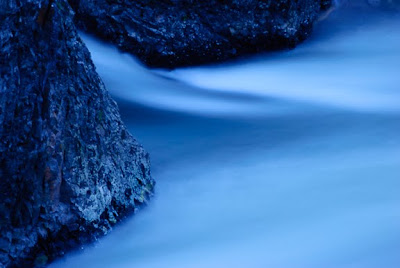
In the meantime, my blog image (30 sec. exposure well after sunset) is what I view as a relaxing image – blue tones, simple composition, and a left to right flow . Now breathe deep and slow – just relax.

Fun with Nik

A couple posts ago, I talked about “Knowing Your Imaging Software”. One of the plugins that I keep running across whether it be fine art nature photographers or wedding photographers is Nik Software’s Color Efx Pro filters. So the other night I downloaded the demo and took it for a spin. It was a lot of fun. After playing around with several of the filters, I tried applying them to various images. The two blog images show the before (top) and after results for one image. The original image from the Portland Rhododendron Garden was good, but after adding a touch of the fog and midnight filters I ended up with an image which better conveys the emotion I intended. I also used Nik’s Viveza plugin to brighten up the stairway just a touch. What do you think?