Category Archives: HDR Photography

Fort Point in HDR – Revisited

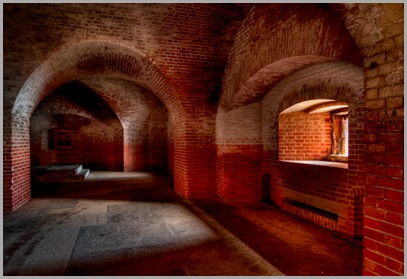
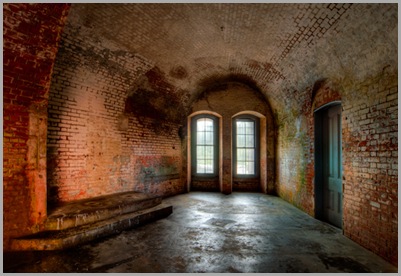
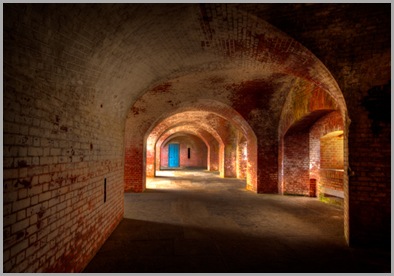
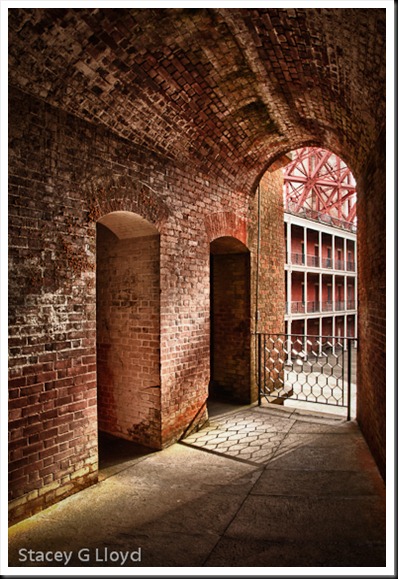
Blog_20111003_2 This past week I was able to return to Fort Point in San Francisco. Unfortunately, due to traffic I only had a 45 minute window in which to shoot before it closed. Here are a couple of images from that visit. It was a great place to photograph the first time and was again the second. If you can go there, I highly recommend it. It is the lighting that excites me when I am there; very dramatic with wonderful arches, lines and shadows everywhere. As before, I shot HDR sets to deal with the extreme light range.
Blog_20111003_1 One thing I decided after my first visit was that this place begs for people in the images. I made use of my camera’s timer to take some images where I ran out into the frame. In the image above, that is me in the window. I shot one medium exposure frame in addition to the HDR set where I stood on the steps by the window. I then blended myself into the HDR image using Photoshop layers and a mask. It looks like I am outside the window, but I am not.

Blog_20111003_3

All HDR images processed with HDR Efx Pro from Niksoftware. Additional processing was done in PS5 with other Nik Filters.

Also posted in Uncategorized

HDR Saves Even a “Bad Day”

Blog_20110424_1-4

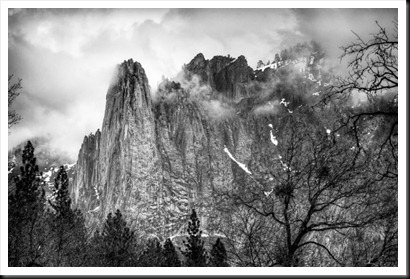
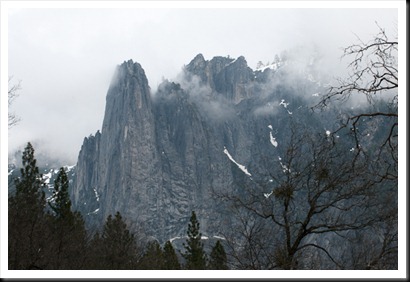
In going back over some images I captured in Yosemite a few months ago, I was once again reminded that even a “bad day” with good subject material can yield great images. When I was in Yosemite the light was flat, the valley seemed gray and the clouds were low. I never did see Half Dome. Below is what an unedited RAW image file from the HDR set looked like. Regardless I decided to shoot HDR exposure sets keeping B&W processing in mind.

Blog_20110424_1-6I just got around to processing some of the images and am quite happy with it. Others ones like that below came out quite nice as well.The power the photographer has with HDR photography and the latest image processing tools is impressive.

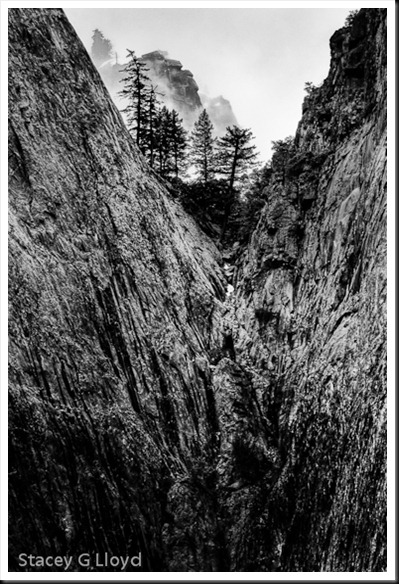
Yosemite NotchYou might be asking if HDR was necessary. The answer is yes and no. The light was such that I could capture images like the first one in one exposure (the one shown is an example). However, I choose HDR to get the most data I could in the shadows and highlights. This allowed me great deal of latitude in bringing out a lot of contrast and detail. 3 exposure was probably plenty, but I don’t get to Yosemite very often.

Blog Images: Both images were generated in Photomatix 4 from 5 exposure sets. They were then post processed using Nik’s SilverEfx Pro. Some additional adjustments were made in Lightroom3.0 and/or with Nik’s Viveza2.  The last image was shot with a 450mm focal length to grab the “V’ composition I saw in the distance.

Also posted in Uncategorized

Return to the Lavender

Blog_20110731_1-6

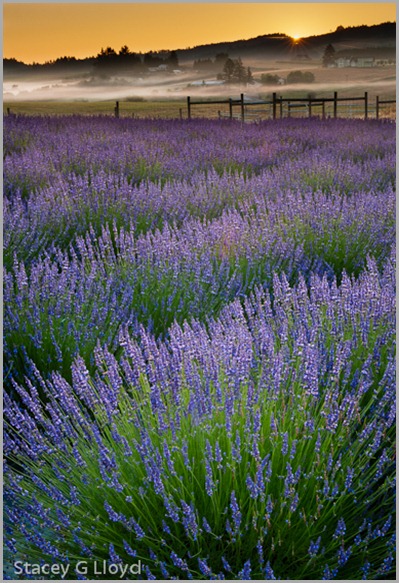
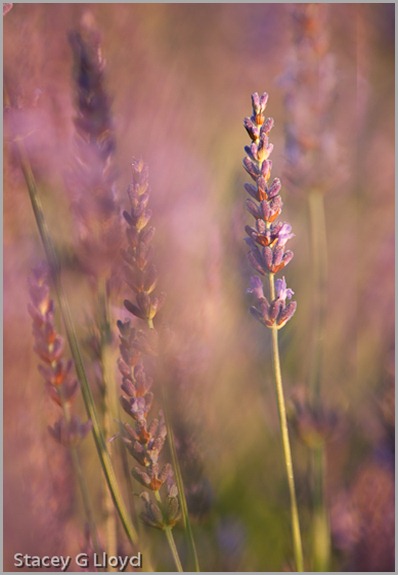
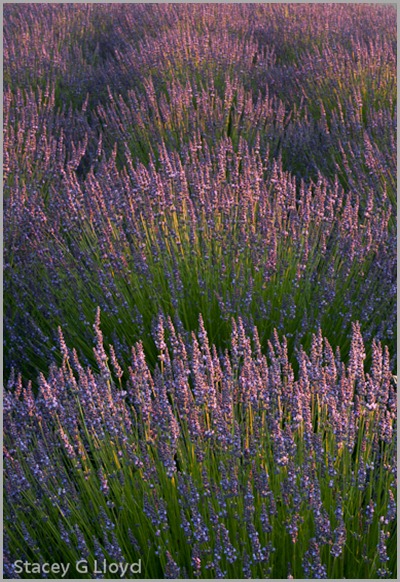
Another year has passed and the lavender returned. Due to other obligations in my life, I was not able to get out and capture much of the lavender this year. A couple of weekends ago, I got the chance to capture a field that was still in reasonable condition. It was at Willakenzie Lavender Farm in Yamhill Oregon. I got  out bright and early so I could catch the sunrise on the lavender. As I drove to my destination it was hard to resist all the possible images I saw along the way. There was nice ground fog hanging here and there along the beautiful valley, but I was determined to catch first light on the lavender. Here are a couple images from that morning.

Blog_20110731_1-9 


Blog_20110731_1-4

Blog images:

  1. This is an HDR image captured at sunrise. I didn’t quite get the sunburst I hoped for. The image was processed with Nik’s HDR Efx Pro with some additional processing in Lightroom.
  2. The second image taken shortly after sunrise was a “shoot through” were I used a long lens (70-200mm zoom at 190mm) to shoot through some lavender and focus on one lavender stem. Shooting flowers with a long lens is  not typically the first thing that comes to mind, but it can result in nice images. f6.3 at 1/160 sec.
  3. The last image captures the sunrise light just brushing the tops of the lavender. 70mm, f22, 0.5sec.
Also posted in Uncategorized

Stonehenge

Blog_20110717_1

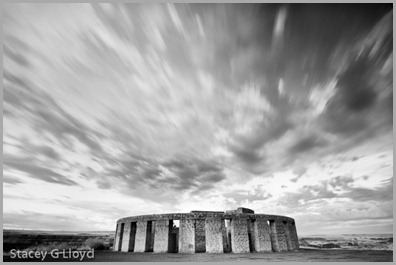
If you live in the NW and haven’t gotten by our own local Stonehenge you might want to take a look. It is off highway 14 near Maryhill (just east of The Dalles, Oregon) near the intersection with highway 97 in Washington state. It is a war memorial styled like Stonehenge – as it might have looked before its deterioration. It is a full scale replica made of concrete instead of carved stone, but it is a unique structure. It sits along the beautiful Columbia Gorge so the setting is quite nice. As a photographer there is a lot with which to work and play.

Blog_20110715_1

Blog images:

  1. Stonehenge has always had a bit of mystery so to add some mystique to the image I used a wide angle lens (12mm on a DX body => 18mm). In addition, I used a variable ND filter to get a long exposure set of HDR images. The HDR set was processed with Photomatix 4.0 using the ghost reduction feature. The image was then converted to B&W using SilverEfx Pro from Nik Software. A vignette was added along with some local adjustments using Nik Color Efx Pro and Photoshop.
  2. The second image was shot at sunset with the sun just breaking through the corner of one of the openings. A small aperture (f18) was used to get the sunburst. In this kind of shot you will get lens flare. All processing in this case was done in Lightroom 3.
Also posted in Uncategorized

Alcatraz Analysis

Blog_20110417_1-2

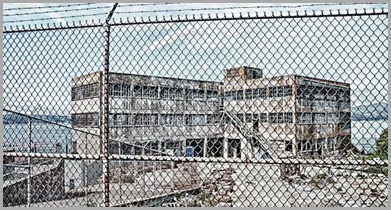
I thought I would take this shot from Alcatraz and walk you through what I was thinking about as I composed the shot and why I processed it the way I did.

The shoot: In some respects this shot was away from the main Alcatraz “attractions” but it caught my eye because of the barbed wired on top of the fence. I felt at the time shooting through the fence would convey the sense of imprisonment. Next I had to decide how to frame the image. I carefully chose where the fence supports were placed. The vertical post was aligned along the building corner and at around 1/3 of the frame space. This seemed to be the least intrusive way to include it. The lower horizontal was placed along the lower edge of the building for the same reason. Keeping the shot a bit wide helped add to a feeling of distance and separation. The prisoners clearly felt that 1.25 mile distance from San Francisco. Keeping the shot wide also let me include the barbed wire which I felt was important to the overall context.

Post processing: This was an HDR image processed with HDR Efx Pro. I did three primary things during the processing. One, desaturated the image to make it more dreary. Two, allowed the white balance to shift a bit to the blue side – prison seems more like a cool place than a warm one. Three, went with harsh contrast which makes the image a bit more edgy.l Prison is a harsh place.

Also posted in Uncategorized

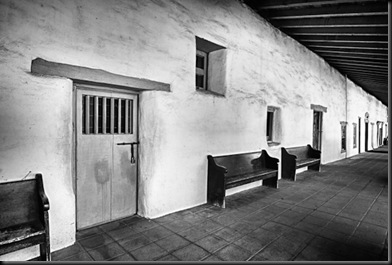
Mission Revisited in HDR

_DSC0520_HDR

A few weeks ago I revisited the San Juan Bautista Mission. If you are ever around Gilroy, California I recommend you visit the mission – quite a beautiful place. The blog image is just one of many I took. HDR photography is a great way to capture the light in and around the mission. While not always needed especially on a cloudy day, it allows you to get more detail in the shadows and bring out a lot of the wonderful texture that is so prevalent at the mission.

Blog Image: 3 exposure HDR processed with HDR Efex Pro from Nik Software using one of the BW presets.

Also posted in Uncategorized

Fort Point

_DSC9648_49_50_51_52-Edit

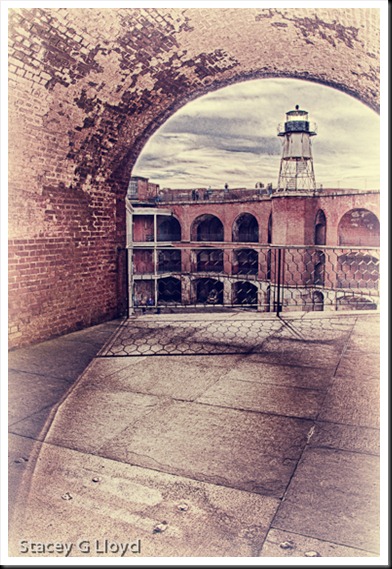
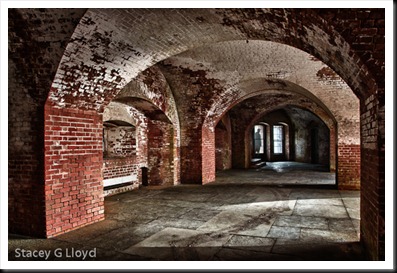
Now and then a place you had no expectations of surprises you. Such was the case with Fort Point in San Francisco. Having visited Alcatraz and the Palace of Fine Arts earlier in the day, I had already been presented with great subject material. But nothing inspired me as much as Fort Point. This Civil War era structure contained unexpected beauty in light and form. Other photographers appeared to appreciate its beauty as  well. Wedding and engagement photos were being shot the whole time I was there. I appeared to be the only one shooting HDR images of the fort itself. I have included a couple of my favorites from the day.

_DSC9709And8more-Edit-Edit

As with any image or any subject, it is still the light that makes or breaks the image and the light streaming through the windows and arches make this place a photographer’s paradise.

_DSC9660_1_2_3_4_5-Edit

Blog Images:

  1. This was the first thing that grabbed my attention as I stepped onto the 3rd floor. Created from 5 1-fstop exposures. Processed with Photomatix 4.0 with Nik Color Efx Pro Color Contrast Filter plus local adjustments using Viveza.
  2. Just before I shot this image a bride and groom were posed to the left of these windows. What a great setting. 9 1-fstop exposures. Processed same as 1.
  3. I usually look for red doors, but a blue one surrounded by orange brick pops just as well. 5 1-fstop exposures. Processed same as 1.
Also posted in Uncategorized

Lighthouse Implied

_DSC8711_HDR

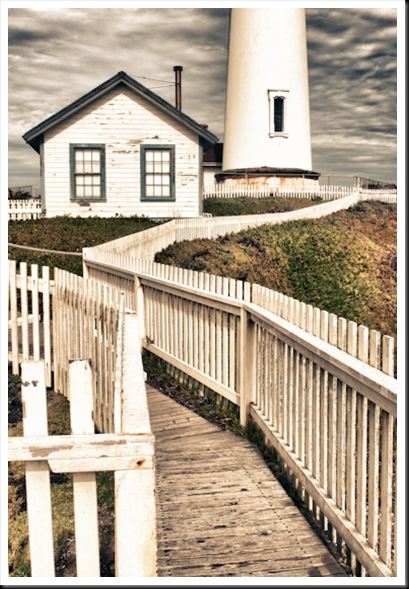
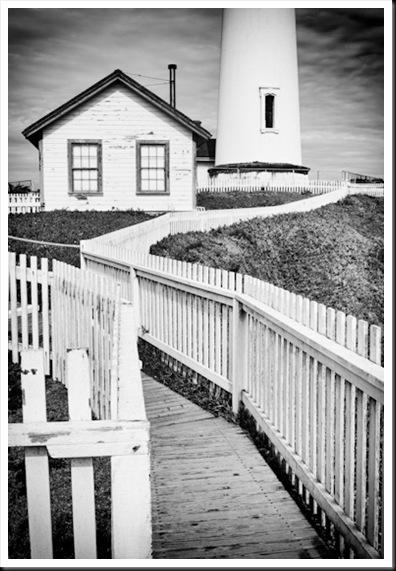
While shooting along the California coast this past weekend, I stopped by the Pigeon Point Lighthouse. It was mid day and I knew I would not be back at sunset or late afternoon. The light was not great but it was better than it had been earlier that day so I decided to capture HDR sets for post processing later.

The first blog image turned out to be one of my favorites. In part, because it only implies the presence of a full lighthouse without showing the full lighthouse. Maybe the top is missing – you don’t know. In general the viewers mind will fill in the missing piece (a type of auto-completion). This concept is something to keep in mind when composing your images and deciding what to include in the frame. Do you need to show everything or is only a piece needed? The fence and walkway provide a nice S-curve back into the picture where you are left with the mystery. Using leading lines of various shapes add nicely to a composition.

_DSC8711_HDR_2-Edit

As with some images, I found that I could process them for different looks that were all pleasing to me. I have shared a couple here for your viewing. Feedback on which approach you like better is welcome.

Blog image: Five exposure HDR image processed with HDR Efx Pro. The later was processed with SilverEfx Pro after the initial HDR processing.

Also posted in Uncategorized

Doc on the Bay

Blog_20110124_1

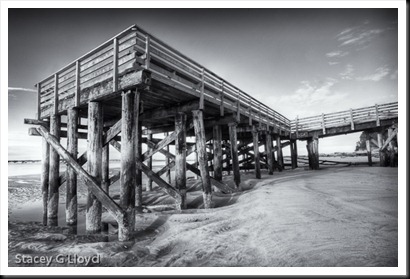
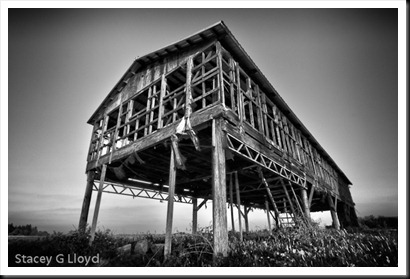
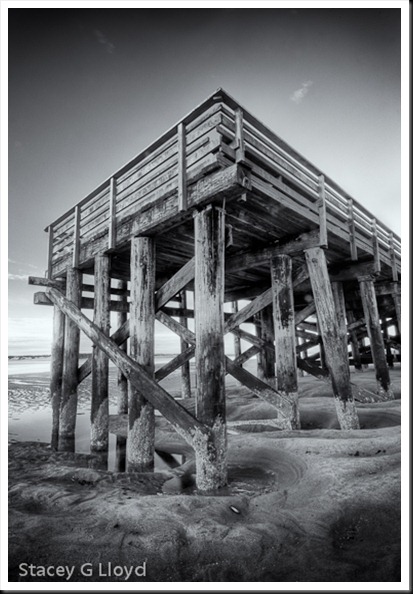
While staying at the beach recently, there was a nice dock across from the hotel. I spent one morning just exploring and working it from different places and perspectives. On top of it, below it, beside it, under it, etc. The lead image is one of many from that morning. If you remember my summer barn shots, there is a real similarity in look to this image.

Blog_20100729_2

This shows how shots you take where you live can help you better capture subjects when you are out at more distant locations.

Blog_20110124_1-3

As always, when you find a good subject, walk around, stick with it and work it. Don’t forget to use your camera both horizontally and vertically. It is so easy to get in the habit of using your camera only one way. If you want to see how strong your horizontal bias is, just look through your catalog of images – you will see what I mean.

Blog Image: These are all HDR images converted with Photomatix 4.0 and then post-processed with Silver Efx Pro.

Also posted in Uncategorized

Painters Tone Map

Blog_20101001_1

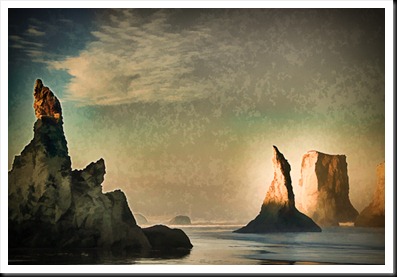
It struck me the other day as I walked through the Portland Art Museum that painters use tone mapping when they create their images. Look at a master landscape painter’s work and you will see what I mean. You can have a painting with the sun shining right at you, yet detail and light in areas that would be very dark to black if shot as a normal picture. The painter sees the full High Dynamic Range of light (as you and I do) and maps the tones as he desires into tones that he can show on a canvas. In some respects, HDR photography has now given that power to photographers.

Blog Image: Just for fun I decided to take an HDR image and make it look like some of the work I saw in the museum. This was a 5 exposure image from Bandon, Oregon. I processed it in a rather extreme fashion in HDR Efx Pro from Nik. This resulted in the bright glow around the stacks to the right. The landscape painters did that in their paintings to create a high contrast area that draws the eye. There is also detail in the stack to the left that wouldn’t be there in a single exposure image but could be in a painting. I then used Topaz Simplify to set to the “oil painting” preset to add the texture. For the final touches, I desaturated the image a little, shifted the white balance (to a bit warmer) and added a vignette.

Also posted in Uncategorized