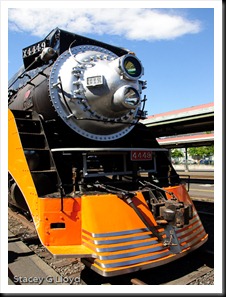
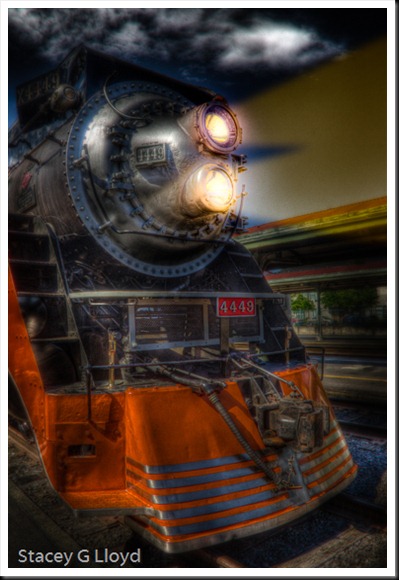
On national train day (May 9th) I went down to Portland’s Union Station with my wife to see the Daylight engine (#4449) out in the open. It was crowded and busy so I had to frame my shots carefully and often very tight to get rid of distractions. As time went on, things opened up a bit and I got this shot. I have taken it from daylight to “nightlight” using Photomatix, Nik Software and Photoshop CS5. Here are the basic steps.
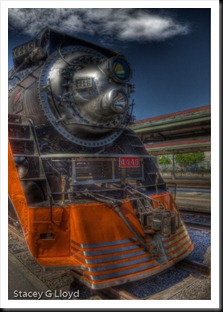
 7 exposures at 1 stop apart (12mm lens) combined in Photomatix and processed dark and grungy – first image on left is one of 7 originals exposures. The second image on the left is the Photomatix output.
- Image opened in Photoshop and
 the Nik Software ColorEfx Pro “Pro Contrast” filter applied.
 - The Midnight filter from ColorEfx Pro was then brushed to darken the image – from 60% opacity at the edges to 30% near and on parts of the train – next image on the left.
- The headlamps
 were then lit up using Nik’s Viveza. Third image on left.
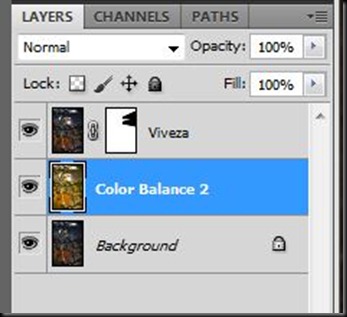
 - A duplicate layer was created in Photoshop and the layered was lighted using Apply Image set to Screen. This layers color balance was then shifted to match the headlamp tones.
- The final step was to move the new layer (color balance 2)down (behind) the previous layer (Viveza), select the light beam shapes using the Polygon selection tool (twice additively), feather the edges (around 30-40) and create a hide selection mask. See the layer stack.
The final image is at the top of the blog. This was a pretty complex set of steps that a video would do wonders to explain, but until then hopefully this gives you some ideas of the process.


