Category Archives: Uncategorized

Pans and Swipes

One of the image techniques I enjoy the most is moving the camera while shooting with slow shutter speeds. Typically one would use a pan when trying to track a subject moving relatively fast against a stationary background. This is often used with sports photography and blurs the background (creating a sense of speed) while keeping the subject relatively sharp.

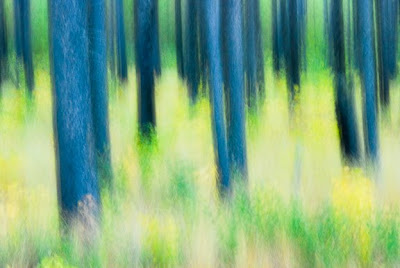
Alternatively panned or swiped images cab be used to create an impressionistic effect. The emphasis becomes the color or basic forms in the image – there is no sharp detail. This technique is very freeing at times and allows the photographer to express their impression of a scene without getting caught up in all the detail. Not sure who the first photographer was to do this on purpose;-) but I know Freeman Patterson talked about it early on; Tony Sweet taught me the technique while William Neil has created an entire body of work based on this technique, “Impressions of Light”.

Both the term pan and swipe get used when talking about camera movement techniques. Coming up with the right shutter speed and camera movement for a particular scene can be where the fun and skill come into play. You can go with a long shutter speed (1-2sec) and just pan back in forth (or up and down) or you can go with a shorter speeds (1/2-1/4 sec) and move in a pattern (swipes): circles, arches, diagonals, waves, etc.

A couple of hints:

1) Experiment a lot. This will give you a sense of what works with what. Have fun.
2) For a simple start try a 1/2 sec shutter speed on a grove of tree and pan up and down. Try shorter and longer speeds, slower and fast camera movement, longer and shorter movements.
3) If there are strong lines in the image – work with those by moving with them (up and down for a tree).

4) As always, you still need good subjects and composition.

A few examples are shown here in the blog.
The lead image is a forest with yellow flowers that has been panned up and down for around 1 second.
The second image shows a bed of roses shot with a circular motion (1/3 second). I choose a circle in keeping with the roses. The diagonal line of the roses gives even more excitement to the image.
The third image is a flower bed swiped downward (1/3 sec). Notice the use of thirds in the composition.
The forth image is swipe of tulip beds (1/2 sec) following the diagonal line of the beds.

And the fifth images shows a cup swipe of another rose bed (1/5 sec).

Lavender Farm

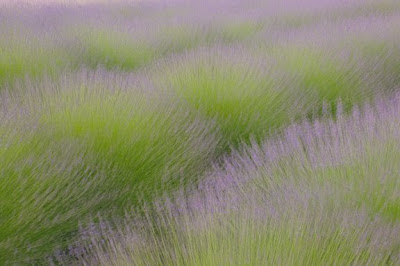
It is lavender festival time in Oregon and I have been so busy at work that I haven’t been able to get out and catch one of the farms. Yesterday on my way from work I was able to swing by one nearby. While the conditions were not optimal (sunny not cloudy), there was a large tree shading some of the lavender. I have included a couple shots from there. This first image uses an Orton filter technique and the later is a 9 image multi-exposure while panning back and forth.

Do the Lensbaby Push

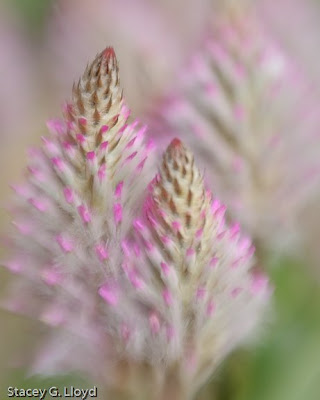
Using a Lensbaby can be a lot of fun. They are especially great when it comes to flower photography. I had been planning to add the macro kit attachments to my assortment of tools (or toys if you wish), but then I learned about the push. Normally with a lensbaby 2 or 3G you are pulling in on the edges and tilting the lens for the desired effect. But you can’t get real close to the subject. If instead you use your fingers to “push” the lens out and extend the corragated tube you can get closer and get a real shallow depth of field . With my 3G I push it to near maximum externsion and then lock it there. The images here in my blog were all shot that way.
Know your Imaging Software

I have been off the blog for a while. My other job has been keeping me busy, but I did get to meet one of my favorite photographers this past week. It is a bit of a long story but I was able to arrange for Tony Sweet to come by and make a presentation to several of the local photography clubs here in the Portland Oregon area (in cooperation with Lensbaby). The first blog image is of Tony and I at the event. I did get to talk to him and bit and learn more about the state of the photography business – that was good.

At his presentation Tony emphasized that professional photography today is at least 50%-60% about having some understanding of the image software available to us and being able to apply it. Tony chooses to use a variety Photoshop plugins because they are powerful and often very easy to use. Ideally we experiment and play with the software tools enough that when we are in the field shooting we can previsualize the image with particular post processing applied.
In keeping with this, I have included an image I previsualized. I ran across this building in Astoria Oregon this past weekend. I knew what I wanted to do with the image when I got home. There were multiple ways to do it, but I choose to take full advantage of Lightroom’s capabilities – reduced clarity, added saturation and a vignette. I think it came out pretty “sweet”.

By the way Tony and Susan are very nice people should you get the chance to meet them or take a class through BetterPhoto.com or one of their many workshops.

The Future is HDR

As I continue explore HDR, I now understand why many photographers believe it is the future. It is when digital photography moves beyond its analog film roots. For some it is the same as the jump from B&W to color. In the end HDR will let you capture the full visible spectrum in a single image file. This is far beyond anything film can capture. These files will be the new RAW. Today we approximate this with multiple bracketed exposures that are combined into a single “HDR” file with SW tools like Photomatrix. A new dimension of creativity and artistry comes into play as the photographer maps (tone mapping) this HDR image into a display medium.: a print, a display, etc. These media are very limited in their luminance range so this mapping is necessary. I will begin explaining more about all of this in future blogs. For now, I have included another HDR image.
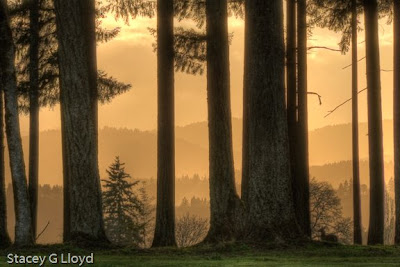
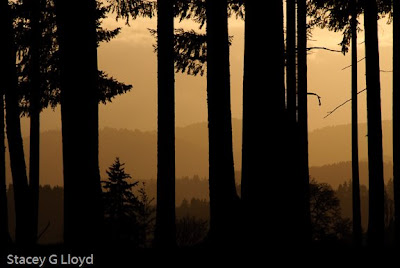
This image is shot toward a sunset on the other set of these trees. There was a beautiful haze between the mountains and the trees. With HDR you can still get all the layering in the haze, but still see some detail in the tree trunks. This is close to what I saw with my eyes. The second image here while nice, is a single exposure image, exposed for the haze.

Flower Power

I like shooting flowers. Maybe that is because I am a gardener. But it may be more than that. I love the bright colors and beautiful images you can create. My flower photography definitely took a big step forward when I took a Better Photo course from Tony Sweet on Fine Art Flower Photography. I highly recommend this course, the techniques used apply to much more than flowers. I have included a couple recent flower images on this blog. Hope you enjoy them.
The first image is simply a unique blue thistle I found at the nursery sitting by our bright orange Adirondack chair. This created a great color combination.

The second image is of three yellow lilies from the garden sitting in front of some pink peonies with an sheet of textured glass in between the camera and the lilies. To create the sharp stamens for the point of focus I shot a second image without the glass and used Photoshop layers to create the image.

HDR Illustrative Look

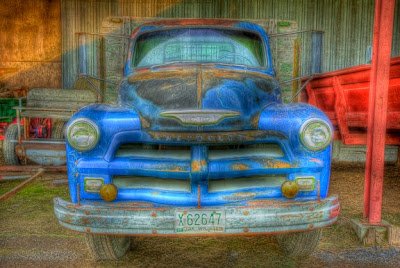
I have had a little time to play with some of my recent images from Washington state. Specifically a little HDR processing. As I have noted before I use Photomatrix for processing my HDR images. One of the things you can do is use it with most of the sliders max’d out is to create a more illustrative look. This it turns out can be done with images shot for HDR (multiple exposures at different EVs) or with simple single exposure images. I have put one of each here in the blog. This first is of the Mt. Rainer train steam engine. This is a single exposure image that has been passed through Photomatrix’s tone mapping multiple times. The second is an HDR shot of an old Chevy truck it was also processed multiple times. Fun look.

Road Trips

My wife and I like to take road trips for our vacations. We have a small T@B trailer we hitch to our pickup. We pick a general area and direction and go explore. The past two weeks we explored more of eastern and central Washington state. This included the Palouse, Spokane, Rosevelt Lake, Leavenworth and Mt Rainier areas. As usual I get up early and photograph. I have found that my success in generating strong images on the road is mixed. Not knowing the areas well it takes sometime to find good subjects at the right time of day, etc. Sometimes I feel too much pressure when trying to photograph. This is especially true when I visit some photographic hot spot for first time (Glacier NP, Yellowstone, etc). I find this eases when I get to spend at least three days at a location. It is even better if I get to return another time altogether. So I have found that I actually enjoy my morning photo sessions better when I am just out exploring some obscure place.
Has this been your experience?

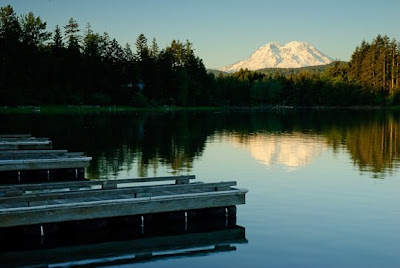
I have included a couple of my trip images. The top image is classic Palouse and the bottom is a Mt Rainier reflection.

A Tree Revisited

One of my favorite HDR nature images is one I took late last fall (early winter) of a tree surrounded by frosty blue-green grass. I have gone by that tree a couple times since. Finally I went by a couple weeks ago while the trees were blooming. The top blog image is a new HDR of that tree with spring colors all around. The second image is the original image shot in the fall. I find that I really like both of these images. As I noted before, good subjects are worth revisiting many times.

Sunrise

As you may have notice several of the image I shot in the orchards were shot at sunrise. Sunrise is an excellent time to find great images. Throw in a little fog or mist and you are in heaven. It is often this mist or fog that distinguishes sunrise from sunset shots. I have included a couple more images shot at sunrise in this blog. The top image shows the fairy tale look you can get with a little mist. In the second image the mist spreads the red glow from the sun all around. In the final image the fog highlights the morning sun rays.