Upcoming Exhibit and Unexpected Publicity

Blog_20110601_1

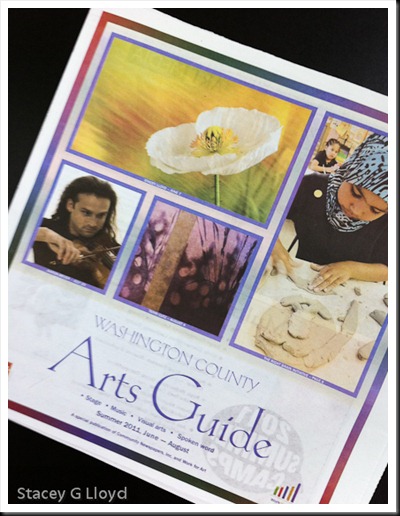
I just delivered my framed prints to the Glenn and Viola Walters Cultural Arts Center in Hillsboro Oregon for my upcoming exhibit. While I was there I was informed that one of my images had been featured on the cover of the Washington County  Summer Arts Guide. This was totally unexpected and I was pleased to see the extra publicity. The “Windblown Poppy” image is mine in case you haven’t seen it.

With the upcoming gallery exhibit my focus as of late has been on publicity. Last week I submitted a press release to multiple newspapers. My wife and I have begun leaving 4×6 exhibit announcement cards at different business we frequent. We also sent out  8×5 flyers to friends and acquaintances inviting them to the opening night.

This blog, Facebook and my website are of course other ways to publicize the exhibit. If you know people in the area please pass along an invite for me.

The exhibit will be open from June 7th-June29th.  Hours are 9AM to 9PM M-Thu, 9AM to 6PM Fri and 10AM to 4PM on Sat. The Glenn and Viola Walters Cultural Arts Center is located at 527 E Main St., Hillsboro, OR 97123. For more information call (503) 615-3494 or visit www.ci.hillsboro.or.us/wcac.

Please join me opening night June 7th: 6-8pm. There will be live music, food and great art.

Posted in Uncategorized

Mission Revisited in HDR

_DSC0520_HDR

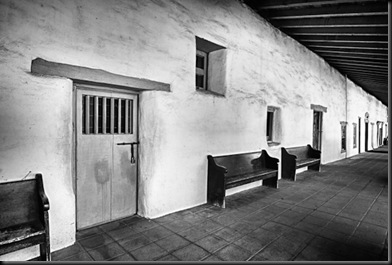
A few weeks ago I revisited the San Juan Bautista Mission. If you are ever around Gilroy, California I recommend you visit the mission – quite a beautiful place. The blog image is just one of many I took. HDR photography is a great way to capture the light in and around the mission. While not always needed especially on a cloudy day, it allows you to get more detail in the shadows and bring out a lot of the wonderful texture that is so prevalent at the mission.

Blog Image: 3 exposure HDR processed with HDR Efex Pro from Nik Software using one of the BW presets.

Posted in HDR Photography, Uncategorized

Look Before You Get There

Blog_20110417_1

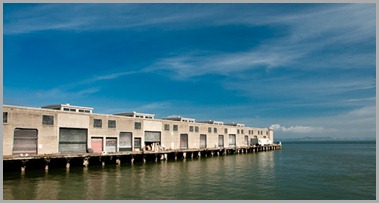
Sometimes when you are headed somewhere for a shoot, you need to keep your eyes open because some of the best images might appear before you get there. Such was the case when I took this blog image a few weeks ago while waiting on a boat to Alcatraz. Not that Alcatraz is not a cool subject, but I really ended up liking this image (I think its that quality of light thing again….).

This isn’t the first time I have had this happen. It is easy to be mentally focused and ready to get “on location” but as always it is good to keep our minds open and see what is right in front of us.

Posted in Uncategorized

First Article

Emerging Fushcia

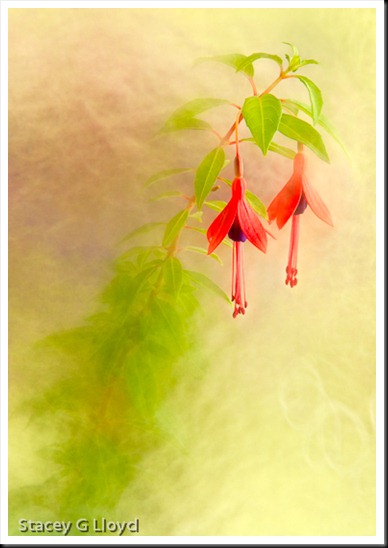
I thought I would share the good news that my first nationally published article on photography will be coming to you via the newsstand on October 18th. It will be included in Shutterbug Magazine’s special issue “Expert Techniques Guide” and is titled “Floral Fusions”. So put that date on your calendar! But if you don’t remember, don’t worry, I am sure I will remind you later!

Now that I am done tooting my own horn, let me give you a little history which might prove useful to those of you looking to get published. First, one of the reasons I started writing this blog three years ago was to start honing my writing skills, so that really was the first step. In some respects, my first draft was posted as a blog entry a year or so ago.

Second, I had to search for possible publishers. Finding out where to submit an article idea isn’t always easy (still haven’t found where to propose articles for some national magazines). I searched online, in the magazines themselves and in the “Photographer’s Market”.

Third, I learned that editors generally only want you to submit a few small images and the proposal for the article – not the article itself. They also want you to provide examples of your writing (this blog served that purpose).  I first proposed this article via email to Shutterbug’s editor last fall. While the editor liked the images, the proposal and my blog, he felt they would be better for a spring edition of the magazine and suggested I resubmit it in February. I did that and he quickly accepted the article proposal. But that doesn’t mean your article will be published.

Fourth, I received minimal guidance on the article itself: less than 500 words for the main body; captions for the images didn’t count against that. Believing that it was best to strike while the iron is hot (what does that mean anyway?) I decided to sit down and write the article that weekend. Keeping it under 500 words was the real trick. I learned to take advantage of the caption text to get in all the necessary information. Creating the captions, selecting the final images and creating illustrations took as long or longer as the article itself. My wife served as my initial editor as she often does for this blog.

Fifth, I submitted the article that Monday as a MS Word document and a Photoshop proof sheet of the images as requested. It only took a week in my case to get a response – made my day.

Sixth, there are the contracts to be signed. Once accepted you need to do the paperwork. This will involve the terms of payment, usage rights, etc. Terms of payment in this case are based on the amount of page area that will be filled by the article – so many dollars for a half page, so much for a full page, etc. Rights can cover not only the printing of the article, but magazine advertising use of the article, website usage, etc. Once the paperwork is done though, this can set you up for future articles.

Finally there is the scheduling of the article. Once your article is accepted, it may be a while before it is actually scheduled for print. One reason my article was delayed to Fall were test reports. When test reports come in at a magazine such as Shutterbug, they trump other articles due to their short shelf life.

In the end, if everything goes well, you will have the satisfaction of seeing your article and images in print, plus a few extra dollars in your pocket.

Now onto writing the next article…

Posted in Uncategorized

Great Photography Takes Work

Full-Moon-at-Bowling-Ball-Beach

While browsing several galleries in Mendocino and Fort Bragg, California this past weekend, I was reminded of the fact that creating great images involves hard work. I have gone into many small galleries over the years and noticed that many of the photographic images are often not that strong or well executed. In talking with the gallery owners many will tell me that “photographs” just don’t sell that well – that is understandable given the all too often anemic work.

Now you may think I am being judgmental or harsh. Who I am to make such judgments? Well, I am just a guy who has seen a lot and can tell the difference. You can tell when a photographer has made the effort to get out there and catch that exceptional light that makes an image sing: one who gets up early, stays well after sunset, a photographer who knows how to create strong compositions, edit down their images and create tonally rich prints.

I had the pleasure of seeing the work of one such young (30ish) photographer while in Mendocino, Jon Klein. His images far out shone the rest in the galleries in that area. Clearly he has spent the time to learn the craft. Sometimes we make the mistake of thinking photography is easy, anyone can do it. While anyone can take pictures, it takes much more to create great images.

Take a look at some of John’s work at Jon Klein Photography. I rarely buy other photographers work, but I did buy one of Jon’s (the blog image) and it was tough to choose. I was also fortunate enough to get to meet Jon while at the gallery. He is a nice guy, making a living off of his work – and I mean work.

Don’t take me wrong, working hard at what you love isn’t all that hard.

Posted in Photographers, Uncategorized

Spring in Infrared

_DSC0061-Edit-Edit

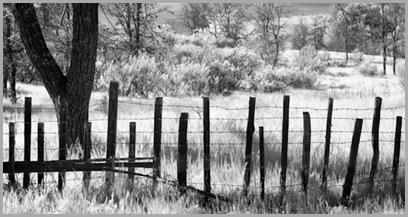
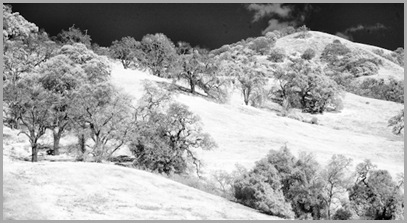
As spring has sprung with its fresh bright and vibrant greens it is time to get out those IR filters and IR cameras. Now that may not be the first thing you think of with spring coming on, but the rich greens of spring do provide great material for those of you who love IR photography. The images here were captured with my Nikon D70 that I had converted to IR last year. Both images were processed using SilverEfx Pro for the B&W conversion.

_DSC0060-Edit-Edit

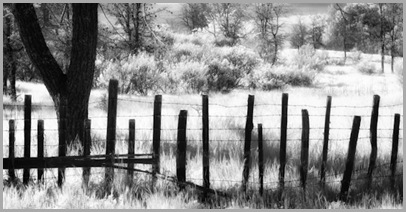
I have repeated the first image at the end of the blog where I have added an IR glow using the Glamour Glow filter in Nik’s ColorEfx Pro software package. This glow is more typical of the IR films used previously.

_DSC0061-Edit-2

If you haven’t tried out IR photography the lower cost way to try it out is using an IR filter. It is more difficult to use (can’t see through the lens once the filter is on) but it will only cost you $80-100 for a good filter. The filter will require very long exposures (tripod required) because the camera’s sensor has an IR blocking filter still in place.

A converted camera is much easier to use, but cost you $250-350 depending on the camera and conversion house. With the camera conversion you can see what are shooting through the lens and the exposures time are much shorter (closer to “normal”).

Posted in Uncategorized

Fort Point

_DSC9648_49_50_51_52-Edit

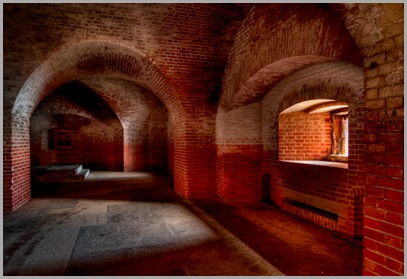
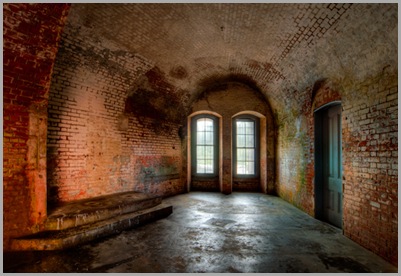
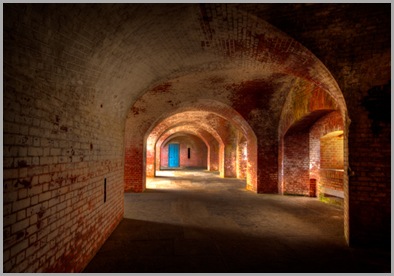
Now and then a place you had no expectations of surprises you. Such was the case with Fort Point in San Francisco. Having visited Alcatraz and the Palace of Fine Arts earlier in the day, I had already been presented with great subject material. But nothing inspired me as much as Fort Point. This Civil War era structure contained unexpected beauty in light and form. Other photographers appeared to appreciate its beauty as  well. Wedding and engagement photos were being shot the whole time I was there. I appeared to be the only one shooting HDR images of the fort itself. I have included a couple of my favorites from the day.

_DSC9709And8more-Edit-Edit

As with any image or any subject, it is still the light that makes or breaks the image and the light streaming through the windows and arches make this place a photographer’s paradise.

_DSC9660_1_2_3_4_5-Edit

Blog Images:

  1. This was the first thing that grabbed my attention as I stepped onto the 3rd floor. Created from 5 1-fstop exposures. Processed with Photomatix 4.0 with Nik Color Efx Pro Color Contrast Filter plus local adjustments using Viveza.
  2. Just before I shot this image a bride and groom were posed to the left of these windows. What a great setting. 9 1-fstop exposures. Processed same as 1.
  3. I usually look for red doors, but a blue one surrounded by orange brick pops just as well. 5 1-fstop exposures. Processed same as 1.
Posted in HDR Photography, Uncategorized

Tripods – Who needs them?

_DSC9000-Edit

If you have been capturing nature or landscape photography for any period of time, I am sure you have encountered the admonition to use a tripod. Generally the arguments for using a tripod are:

  1. It slows you down and makes you think about the composition and framing (what you include in the frame) more carefully.
  2. You will get sharper and more stable images (no hand shake, etc.)

While both of these statments are true, I would like to come at it from a little different perspective. You probably paid a few $$$ for a nice camera and lenses. If you really want to be able to fully use what you paid for, you need a tripod (more $$$). Why do I say that?  Do you…

  1. Want to really use the full range of f-stops on your camera as your personal vision requires? You need a tripod. If you want a nice bokeh in the background but want the tip of the stamen of the flower in sharp focus, you need a tripod so you can get that focus dead on. Or maybe you want everything sharp from front to back when the sun is not full and bright -you need a tripod so you can go to f16+ and not get blur due to shake.
  2. Want to use those slower shutter speeds to maximum advantage? You need a tripod. Do you like the look of a still calm ocean or a soft flowing waterfall? Then you need a tripod to let you shoot those long exposures.
  3. Want to get the crisp sharp images your expensive telephoto can provide? You need a tripod. Even with image stabilization you are typically limited on the shutter speed/f-stop combination you can use without some loss of sharpness. The more you zoom in, the more you need that tripod.
  4. Want to create images with a wide dynamic range? You need a tripod. If you want to participate in the world of HDR photography, you really need a tripod to make sure all those multiple exposure shots are perfectly aligned. While software can help a lot with the alignment, it isn’t perfect and the edges may not be clean as you enlarge the image.

But maybe you say a tripod cramps your style. To that I would say two things. One, not being able to fully use your camera’s capabilities should be cramping your style. Two, take that camera off the tripod when you are deciding how to compose the image. Walk all around, move in, move out, up and down. Once you find the shot, set up the tripod and capture the image.

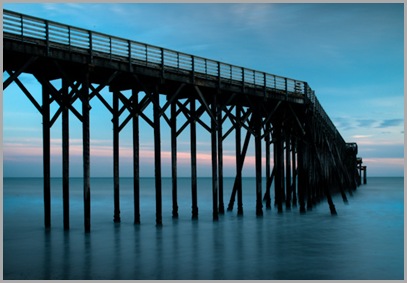
Blog image: This shot of a pier in the ocean required a very long exposure, 20 sec, plus great depth of field, f22. Something you just can’t do without something like a tripod.

Posted in Uncategorized

Exploring Where You Are

_DSC8794-Edit

With my temporary relocation to California, I ended up in the heart of Silicon Valley. An area covered with hundreds of buildings and myriads of industrial parks. While I used weekends to explore areas outside of the valley, I also captured images within.

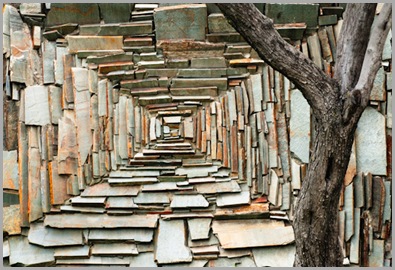
One of the first things I noticed in my immediate surroundings were all the various textures and stone work on many of the buildings. There was also a wide variety of trees around the buildings (some not native to the NW). As a result I started collecting images of the unique textures and those textures juxtaposed with the trees. Will this become a new body of work in time? Maybe.

_DSC8812-Edit

Challenge yourself to see the common threads in the area you live. What characteristics make your area unique?  – ones that identify where you are. Look at the flora, trees, buildings, homes, sky, land, industry, etc. This is typically easier when you first arrive in a new area so it will take some effort to put on new eyes where you live. Is there a body of work you could create or put together unique to your area?

Posted in Uncategorized

Another Day Another Pier

_DSC9004-Edit-4

It often seems to be the case when you are at the ocean that a cloud layer comes in from the west just before sunset. That was the case when I went out to shoot near Cambria, California. An hour before sunset the clouds rolled in and there went the nice warm glow on the cliffs. Instead of hanging it up, I decided to drive back to a pier I had seen earlier. A nice pier jutting off into the ocean near Harmony, CA. I wanted to work more with long exposures (5+ sec) that night and the waves breaking at the base of the pier would work nicely.

As always, when working a subject, you should try different compositions, framing options – vertical and horizontal, abstract parts of the subject, visualize different post processing, etc. I have included just a couple of the images here from that evening shoot.

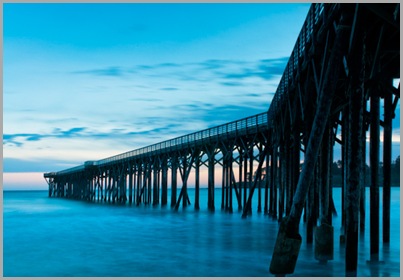
The first image is a 30 sec exposure which is what gives the water such a mysterious look – large waves really add to this effect. The blue water and sky add to the very soothing yet mysterious image where the pier draws you in.

_DSC9017-Edit

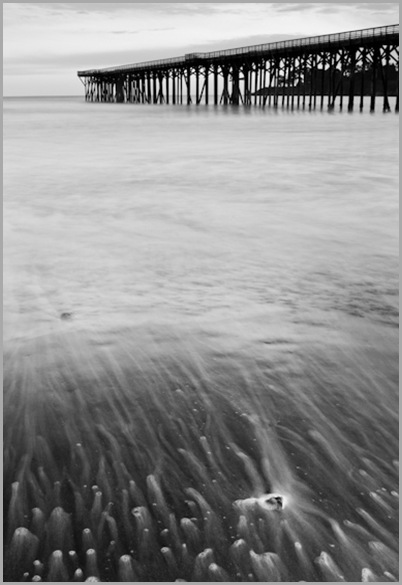
The second image exposure time is less than that of the first, only about 8 seconds. It was timed so that the wave was receding into the ocean, creating lead in lines using the trails from the stones. There was one larger stone that I carefully placed in the frame before the wave came in.

_DSC9021

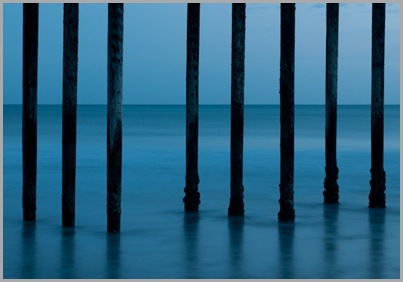
The third image has a simple rhythm. Note that your eye is drawn to the break in the rhythm. The rule of thirds was applied here, not by placing the subject there but the absence of one (negative space). In this case, a 15 sec exposure was sufficient to smooth the water and eliminate strong distracting details in the water. The sky and water were becoming nearly one in tone as the evening came on.

Posted in Uncategorized